Showing posts with label houseplants. Show all posts

Thursday, January 17, 2019

HOW TO DRILL HOLES IN POTS (HOW TO CREATE YOUR OWN DRAINAGE HOLES)

Hi there!

I'm here to write a post that I wish had been on the Internet this time, last year. 2018 was surely the year of the houseplant and I fell deeply victim to the trend. The one thing I kept having trouble with? Finding cute pots WITH drainage holes. Don't let anybody fool you-- no amount of rocks on the bottom of a pot will create as good of drainage as an actual drainage hole. If you're serious about your plants, you won't mess around with rocks. What you will do is..

buy a diamond drill bit.

Yep. You're gonna need a drill if you want to have botanical fun this year! This revelation pushed me to buy a drill that I already was in dire need for because of the amount of furniture I assemble and DIY projects I take on. If you don't have a drill, you'll eventually need one as time goes on so just consider this an investment into adulthood.

As I was trying to navigate the world of drainage, I kept seeing blips of advice from random plant websites and blogs talking about the need for a masonry drill bit. These bits are blunt and dull and truly take AGES to get through well-constructed pots, if ever. There is a much higher risk of cracking your planter using one of these as well given the amount of pressure necessary to get a hole going.

Diamond bits are like slicing cheese with a razor compared to masonry bits.

Let's go step-by-step...

Screenshots are from a previous Instagram story so don't mind my green, semi-unappealing text
1. Attach the bit to your drill.
        You can get a variety of different sized bits but I went with a smaller one (1/4") because of cost. It would be better for you to buy a bigger one for this purpose because what I usually ended having to do was drill multiple holes in pots to ensure proper drainage-- you'll see below. If you were curious, this is the drill that I own. This is the drill bit.


2. Prepare your pot
        I usually drilled my holes within my kitchen sink so I could continually have cool water running on my workspace. Just like cutting tile, you need to keep the area you are drilling into constantly cool to protect your pot from cracking. The friction of this drill bit on the pottery makes the spot very, very, VERY hot without running water atop it.

This planter I was working on is the Wood Base Planter from West Elm. West Elm looooOoves to put drainage "wells" in the bottom of their pots in lieu of drainage holes but again, don't fall for it. That is not going to work. In 2019 I've already seen stores such as Target really embracing the plant pot as a trend and the majority of theirs are cheaper than the stores/outlets that used to sell pots before they were trendy AND typically have drainage holes already. Thank goodness.
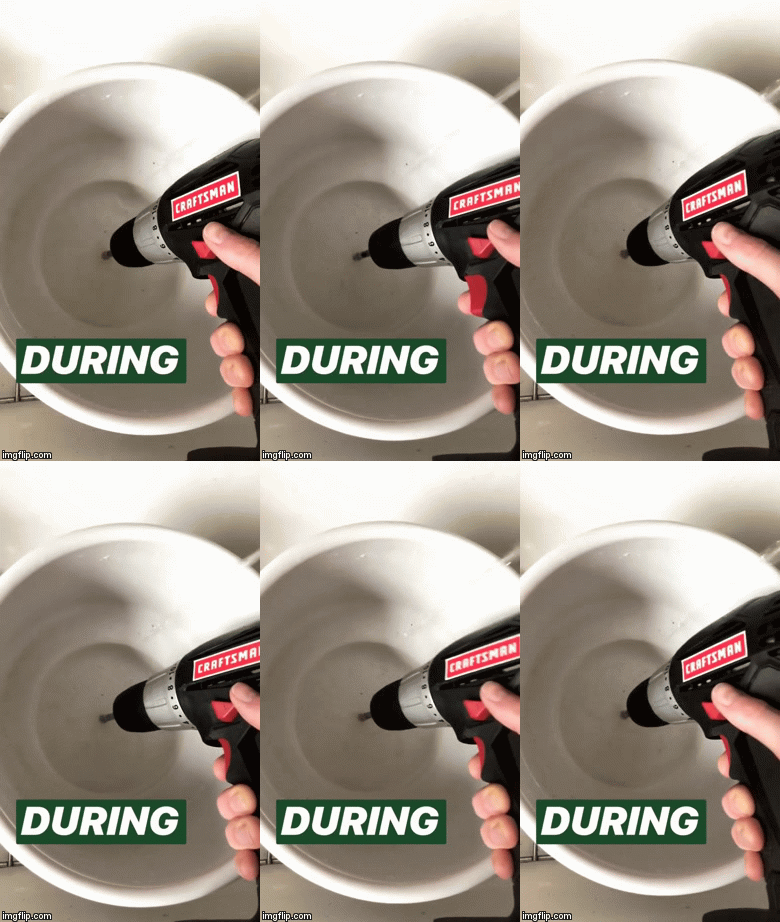

3. Begin drilling
        You must begin drilling at a 90° angle which, given the nature of this project, is sometimes difficult. Try your best. What you're needing to do is get the rough side of the drill bit to get past a glazed exterior and begin to actually work itself into the pot. Once you have a decent enough depth in, you can turn the drill upwards and begin drilling normally. You are creating a ring shape that will eventually make its way through the pot and out the bottom, creating a perfect hole.
        You can only drill normally as deep as your initial 90° angle depth. Once you've hit your max, angle the drill again and keep digging down. Some pots/planters are super thick and will take some time to get through. Some are thinner or softer (like terracotta) and won't take much time at all. PLEASE be gentle! Thinner or softer materials can crack if you apply too much pressure. Just keep at it and take your time while letting the drill do the hard work for you.


4. All done!
        You may want to add a few more if you're working on a larger pot like I was. You do this the same way you did the initial hole-- just be aware that the base is slightly compromised with a hole in it now and could become more fragile during subsequent hole drills.


Like I mentioned previously, I sometimes add extra holes to assist in drainage so there isn't a ton of water sitting in the bottom of my pot waiting in queue to drain. I only want my plant getting the absolute exact amount of water that it needs.

That is pretty much it! I hope this helps some people because I know for sure it would have helped me. Just remember-- diamond bit > masonry bit. No matter what people say!

If you have any questions at all, leave me a comment below. Or if you just want to share your plant parent success stories I am ALL ears! I love seeing people's indoor (or outdoor, really) jungles.

If you want to shop this post, I've listed any items I mentioned today below (for pot and ones similar to it) or within this post as links (for drill, drill bit):

Friday, January 11, 2019

15 CUTE POTS + PLANTERS FOR SPRING 2019

2018 was the year of the houseplant. I got deep into the trend and I know so many of you did as well. It seemed the mass market stores weren't aware of the trend or at least couldn't keep up with demand if they were beacause the problem I continued to have throughout the year was finding cute pots and planters from regular stores. Thankfully, 2019 is starting off on a good foot in that regard because they are much easier to find now and we're only half a month into the new year. I have compiled a list of my favorite pots, planters and plant stands on the market right now. Some of these I currently own, have owned in the past (but got rid of when I moved and downsized my plant fam), have seen in-store or just know to be of good quality from my research. whod have known/b

If you're worried about drainage holes, fret not. I have a post coming next week about adding holes to ANY pot you get, even ones without any drainage to begin with. Stick around for that post before you go out to buy rocks for the bottoms of your pots :)


1. World Market Sevilla Planters (Click for black collection, white collection and grey collection, two sizes)
2. Target Project 62 Ceramic Planter with Metal Stand White/Black (three sizes)
3. Target Project 62 Stoneware Planter with Stand Orange/Gold (two sizes)
4. World Market Dark Turquoise Ceramic Planter with Wood Stand
5. Target Threshold White Planter (smaller size)
6. Target Project 62 Stoneware Floor Planter with Wood Stand White/Brown
7. CB2 Lupa Planters (two sizes)
8. Urban Outfitters Bistro 12" Rattan Planter + Stand
9. Target Project 62 Ceramic Planter with Stand White/Black (three sizes)
10. Target Project 62 Hexagon Stoneware Planter Terracotta (three sizes)
11. Urban Outfitters Parker 6" Planter + Drainage Tray Sets (also comes in 4" and 10")
12. West Elm Half Dipped Planters (two sizes)
13. Target Smith & Hawken Plant Stand Black & Wood
14. Serena and Lily Dip Dyed Stools (two sizes, three colors)
15. Target Project 62 Terrazzo Plant Table

I hope you all enjoy these decently affordable pots, planters and plant stands. I'm probably going to be buying a couple for myself soon in preparation for spring. To make shopping a bit easier, I've added most of these planters to the widget below for you:


Wednesday, October 31, 2018

HOUSEPLANT SPOTLIGHT: FICUS TINEKE (VARIEGATED RUBBER PLANT)

This is the first post of a little series I am beginning on houseplants. I bought my first true houseplant last January and fell into a deep, deep obsession over the first half of 2018. I've calmed down a bit and have sold off many of the plants that I purchased. If you want to see my path of destruction (to my wallet and much more), check out my @plantlifebai account on Instagram.

Now that I've found myself on the other end of my obsession, the plants still standing have stood the test of time and I can whole-heartedly call them my "favorites".


photo of variegated ficus tineke

My first and considerably my MOST favorite plant is this guy: Ficus Tineke. This is a variegated version of a Rubber plant and thus, sometimes is called a Variegated Rubber plant. The variegation in the leaves of this plant is soooooo pretty to me-- it looks like a watercolor.

I first fell in love with Ficus Tinekes on Instagram and it took a few weeks for me to hunt down a little 4" one from my local nursery. I babied that little plant until one day when I got a call from that same nursey informing me they had 6" Tinekes with multiple stems and beautiful variegation. The issue with most Tinekes that I had come across was that the variegation was mostly dark green without much of the pretty white in the leaves that I loved. Skeptical, I went over to my nursey and COULDN'T BELIEVE MY EYES! So many perfect ones with the most variegation I had ever seen! I took a few and plopped them down on the ground to compare to one another and finally landed on a winner.

The plant came home with me and I repotted it into a slightly bigger nursey pot and added in the cute 4" one that I had been growing in the few months prior. I now had a massive, insanely photogenic Variegated Rubber plant.

The Ficus family is a hardy bunch-- with the exception of the well-known Ficus Lyrata-- and don't need tons of direct light. They are okay with indirect light in a South or West facing window-- possibly even East. Ficus Tineke need a bit more than your run-of-the-mill Ficus simply because they are variegated, which means they have less chlorophyll in their leaves to absorb sunlight. That being said, this plant has been in a planter behind my desk and has done just fine. Each day after work I will place it on my kitchen table next to a Western window for a handful of hours to give it some brighter sun before putting it back into its planter.

As for humidity and watering, I like to mist my Tineke every other day or as often as I remember. You can't really harm the plant with too much humidity, however, you CAN water the soil too much. I learned this the hard way when my 4" plant got fungus gnats from my overwatering even though I only watered about once every week or week and a half. Thankfully I caught the gnat problem when they were still larvae and swapped out the wet soil for new (dry) soil which suffocated those buggers. My current watering plan is once every two weeks and I will wait even longer between waterings as the weather cools down and the plant enters dormacy.


Are you guys interested in my houseplant series? Let me know below :)


I would love to know if you have any houseplant questions or requests for care tips. LMK in the comments below!

 
09 10