Showing posts with label beautymunson. Show all posts

Tuesday, December 4, 2018

HOLIDAY GIFT GUIDE: JEWELRY LOVER

jewelry laid out from south moon under, baublebar and kendra scott for holiday gift guide inspiration


I'm not big on gift guides BUT I have found myself drooooooling over some jewelry lately across a few different sites so I figured I'd throw together a mix of what I've seen that's new and pretty in jewelry land.

1. I have two favorite stones from Kendra Scott. I love her opals and I love her dichroic glass. These studs are the latter-- and come in two more colors! They're fairly large for studs-- which I prefer. If you're gonna buy pricier jewelry that you think is cute for someone, I think they should show them off as much as possible!

2. If you follow me on Instagram then you know about my obsession with South Moon Under's resin tortoise earrings. I own two of the three shown above and fully intend on buying the third as well. I love the creaminess and contrast of this tortoise pattern and they're sooo light. It's like you aren't even wearing earrings. I sent a picture to my sister after I bought my first pair and she immediately went and bought the same ones. They're definitely a gifting winner!

3. Another fave of mine from Kendra Scott are her lariats. This one comes in three colors and is a unique addition to a layered necklace look.

4. This necklace looks a bit wild but I think it's just so cool. The discs look like they're floating on your neck and the choker length creates an edgy, yet simple vibe. AKA MY VIBE. Edgy, yet simple. Always. This one also comes in silver!

5. On the topic of creamy and contrasted, this sweet bracelet is just that. I'm a sucker for anything black and white and speckled. This bracelet is made of dalmatian stone-- which, other than sounding cute, balances the emotions and body. Plus, it's stretchy. Who doesn't prefer a stretchy bracelet? This allows it to fit many different sized wrists so it makes a worry-free gift.

6. Next are some statement earrings. They also come in a blush but something about the black and gold screams New Year's Eve to me and these would be the BEST party earrings for somebody. These also come in blush!

7. Lastly is this delicate letter necklace. You can pick any letter you want for your recipient for your name, their name or anything else your heart desires. I want to pick up the 'B' for my first name (and future last name!) The chain balances the off-kilter letter by placing in two small stones up the chain to the left. It's dainty and understated but will feel extra special with the personalized letter-- without having to pay for an actual personalized gift.

Feel free to shop this post below:

Monday, December 3, 2018

FULL FACE OF MAKEUP SAMPLES + FIRST IMPRESSIONS

Hi there!

I recently uploaded a video to my YouTube channel trying out various makeup samples that I have had sitting around for ages. I love collecting samples of products but I'm terrible at using them up and this video was the perfect solution for that problem. Check the video out below and keep scrolling to get the dirt on my first impressions of each item.


I started with the Glossier Priming Moisturizer which made my face moisturized and tacky. The tackiness spoke to how this product performs as a primer but I can't speak any more on that because I don't know how the other face products would have performed unprimed or over my usual primers. As a moisturizer, though, it was solid.

I began my eyes with the Stila Shimmer & Glow Liquid Eyeshadows in 'Kitten' and followed up with 'Twig'. Kitten was insanely metallic and reflective (very Charlotte Tilbury Hollywood Beauty Wand-esque) and blended great. Twig was terrible. It stuck down where applied and did not blend whatsoever. On top of that, it wasn't even that shimmery. In order to blend Twig out as much as I could I applied Bite Beauty Multisticks in 'Cashew' to the crease and it solved all my issues. I've used Bite's Multisticks in the past (from samples) and they're a fantastic multiuse product. To date I've used it in the browns, on the eyes, on the cheeks and lips. I tried to add a bit of depth by adding in Twig as a top eyeliner. Didn't work very well as that either.

To start with my face I applied the Dr. Jart Premium Beauty Balm in 'Light to Medium'. I've had a few samples of this in the past and liked it enough to ALMOST buy it on one occassion but it is simply just a shade too dark for my natural complexion and for that, I haven't bought it. But I do enjoy it as a product. To clean up my undereyes I applied Cover FX Power Play Foundation in 'N30' in a concealing manner with a stiffer, detailed face brush. I initially expected this shade to be significatly darker than me but it ended up looking just fine. It did its job as a concealer but I can't speak to the longevity as a full face foundation. Next was Hourglass Cosmetics Ambient Lighting Powders in 'Dim Light' and 'Radiant Light' to set my undereyes and bronze up my cheeks. I really enjoyed Dim Light as it brought a healthy filtered glow to my eyes. I liked it so much that I may even pick up a full size. To finish up the face I went in with Bite's multistick in 'Biscotti' as a blush.

I got the godfather of all samples in the Anastasia Beverly Hills Dipbrow Pomade in 'Ash Brown' and three other shades. I expected Ash Brown to be a terrible match for me but in the theme of this video, it ended up being just fine. I never expected to like Dipbrow because I've always been happy with powder products and never even enjoyed pencils like the masses do but MAN.. I LIKED DIPBROW. I already purchased it in my more proper shade. Review coming soon!

Last up was Sephora Collection #LIPSTORIES Lipstick in 'Labyrinth City'. I applied it over a base of that Bite Multistick in 'Biscotti' and it was a pretty, typical matte rose lippie. It was super comfortable on the lips but I feel that may have been because I applied it over the creamy multistick.

I was so caught off guard with how many products I genuinely liked and I'm proud that the samples served their purpose-- to allow me to try a product for free and form an opinion prior to buying.

Filming this video inspired me to use up my samples as I receive them in hopes of finding more products I like that I had never thought to try out before. Do you like the final look? Let me know in the comments!

To shop the products I used in this video, see below:


Saturday, November 24, 2018

HIS, HERS AND OUR PINNED LOCATIONS

This thing was so popular on my Instagram stories that I wanted to pop on here real quick to share with the link so everybody can have this before it goes away after the holidays!

color coded locations pinned on a cork board map for his and hers

I bought this cork USA map ornament from Target last year and pinned all of the places me and Charlie have been either on our own or together and color-coded it all. The cute star pin comes with the ornament!

Yellow = Places Charlie has been by himself
Pink = Places I've been by myself
Orange = Places we've been together

These are the pins I have but Target also sells a gold, black and white pack as well.

I hope you all enjoy.

Thursday, November 22, 2018

THANKSGIVING OUTFIT

Happy Thanksgiving to all of my U.S. readers!

I wanted to pop on real quick to share the outfit that I wore today. Let me just say one quick thing prior, though: stretchy pants.

girl against brick wall wearing flare jeans and orange sweater for thanksgiving


I picked up my pants and sweater the other day during South Moon Under's 20% off $150 sale. The pants are PULL ON with an ELASTIC WAISTBAND. They're unbelievably comfortable and super, super cool. My (future) bro-in-law told me I looked straight outta the 1970's and I could have melted into a puddle of pride right there. That is my goal in life like, every day.

The sweater has a hella dramatic cowl neck and I was worried it wouldn't 'lay' right but it somehow naturally falls really well. It wasn't my initial plan for my top but it was record-breakingly cold today so I absolutely needed more warmth than the tunic I'd originally planned.

I wore some studded, open-toed shoes (old Jeffrey Campbells, also from South Moon-- the 'Bess' style) with socks because again, cold and paired everything with these really chic resin tortoise hoops. It was entirely unplanned but somehow my entire outfit was from South Moon. 

IMPORTANT NOTE: South Moon Under's Black Friday sale is currently on and they're advertising 30% off EVERYTHING! This is an post is not sponsored-- I just love that store! Go go go get whatever you've been wanting.

Check out my ShopStyle below to see the exact items I wore and again HAPPY THANKSGIVING!


Monday, November 19, 2018

WELCOME TO BAILEY BEE

I am so excited to finally share my new blog name and design with you all!


In just a handful of weeks, my blog turns six years old. I began this blogging journey while on an off-semester in college shortly after deciding to transfer to an in-state school from my out-of-state family school. Throughout the life of this blog I have proceeded through and finished college, joined the professional world and got my own place with my significant other. Beautymunson was my place to pop on and interact with others who share a love for all things beauty. It became such a part of my identity that it is actually a nickname many of my friends now call me in real life.


However,


I love sharing things with all of you so much and those things are no longer limited to just beauty. That paired with the fact that I will eventually be dropping Munson as my surname led me to the decision to rename and rebrand this online home of mine.


Bailey Bee is a beauty, home and lifestyle blog.


Nothing changes but a name and a color scheme so please stick around! I have my own domain now (check it out!), a new email (hello@baileybeeblog.com) and a whole slew of ideas for this page. My main goal for this blog has not and probably will never change-- it is still to create a personal community within the larger beauty, home, lifestyle and overall blogging communities.


Thank you for all of the support over the past six years and here's to six more successful ones!

Love, Bailey

Friday, November 9, 2018

FOODIE FRIDAY: VEGGIE LASAGNA

Happy Friday! TGIF!

I'm SO happy it's Friday because I FINALLY get to share this recipe with all of you that I perfected this past weekend.. I always take recipes that I find online/in books as "suggestions" and add or subtract whatever I want and kinda just.... make it up as I go once I've gotten some guidance from the original source. I, for the first time, truly perfected a recipe while completely winging it. Mmmmmm I wish I had more of this left to eat it again even though I ate it alllllll week long.

Let's get into it. Making a veggie/vegetarian lasagna. Trust me, you will love this one.

veggie lasagna in pan and plate featuring squash and carrots

Adapted from Cookie and Kate

Ingredients
  • 2 tablespoons extra-virgin olive oil
  • 3 large carrots, chopped (about 1 cup)
  • 1 medium zucchini, chopped (about 1 cup)
  • half one medium butternut squash, chopped (about 1 cup.. or a bit more)
  • 1 medium yellow onion, chopped
  • ¼ teaspoon salt
Tomato sauce
Remaining ingredients
  • 2 cups (16 ounces) ricotta cheese
  • ¼ teaspoon salt, to taste (aka more)
  • Freshly ground black pepper, to taste (more)
  • 9 lasagna noodles
  • 8 ounces (2 cups) freshly grated low-moisture, part-skim mozzarella cheese (more won't hurt)
  1. Preheat the oven to 425 degrees Fahrenheit.
  2. To prepare the veggies: In a large skillet over medium heat, warm the olive oil over medium heat. Once shimmering, add the carrots, zucchini, yellow onion, and salt. Cook, stirring every couple of minutes, until the veggies are golden on the edges, about 14 minutes. Remove the skillet from the heat and set aside.
  3. Meanwhile, to prepare the tomato sauce: Pour the tomatoes into a mesh sieve or fine colander and drain off the excess juice for a minute. Then, transfer the drained tomatoes to the bowl of a food processor or blender. Add the basil, olive oil, garlic, salt, and red pepper flakes. Pulse the mixture about 10 times, until the tomatoes have broken down to an easily spreadable consistency. Pour the mixture into a bowl for later. Rinse out and return to the machine.
  4. Transfer the cooked veggies to the bowl of the food processor. Pulse until they are more finely chopped, not super puréed (although that's okay too!), about 5 to 7 times, stopping to scrape down the sides as necessary. Pour into a separate bowl and add in ricotta cheese. Mix then add salt (to taste) and lots of freshly ground black pepper. Stir to combine. Now it’s lasagna assembly time!
  5. Spread ½ cup tomato sauce evenly over the bottom of a 9” by 9” baking dish. Layer 3 lasagna noodles on top (overlap their edges as necessary). Spread half of the veggie & cheese mixture evenly over the noodles. Top with ¾ cup tomato sauce, then sprinkle ½ cup shredded cheese on top.
  6. Top with 3 more noodles, followed by the remaining veggie & cheese mixture (we’re skipping the tomato sauce in this layer.) Sprinkle ½ cup shredded cheese on top.
  7. Top with 3 more noodles, then spread ¾ cup tomato sauce over the top (you may have a little sauce leftover) to evenly cover the noodles. Sprinkle evenly with 1 cup shredded cheese.
  8. Cover the lasagna with aluminum foil, but don’t let the foil touch the cheese. Bake, covered, for 18 minutes, then remove the cover, rotate the pan by 180° and continue cooking for about 15 more minutes, until the top turns spotty brown.
  9. Remove from oven and let the lasagna cool for 15 to 20 minutes, so it has time to set and cool down to a reasonable temperature. Sprinkle additional basil over the top, then slice and serve.
vegetarian lasagna ingredients

I hope you enjoy! Let me know if you make this lasagna! 😋

Wednesday, October 31, 2018

HOUSEPLANT SPOTLIGHT: FICUS TINEKE (VARIEGATED RUBBER PLANT)

This is the first post of a little series I am beginning on houseplants. I bought my first true houseplant last January and fell into a deep, deep obsession over the first half of 2018. I've calmed down a bit and have sold off many of the plants that I purchased. If you want to see my path of destruction (to my wallet and much more), check out my @plantlifebai account on Instagram.

Now that I've found myself on the other end of my obsession, the plants still standing have stood the test of time and I can whole-heartedly call them my "favorites".


photo of variegated ficus tineke

My first and considerably my MOST favorite plant is this guy: Ficus Tineke. This is a variegated version of a Rubber plant and thus, sometimes is called a Variegated Rubber plant. The variegation in the leaves of this plant is soooooo pretty to me-- it looks like a watercolor.

I first fell in love with Ficus Tinekes on Instagram and it took a few weeks for me to hunt down a little 4" one from my local nursery. I babied that little plant until one day when I got a call from that same nursey informing me they had 6" Tinekes with multiple stems and beautiful variegation. The issue with most Tinekes that I had come across was that the variegation was mostly dark green without much of the pretty white in the leaves that I loved. Skeptical, I went over to my nursey and COULDN'T BELIEVE MY EYES! So many perfect ones with the most variegation I had ever seen! I took a few and plopped them down on the ground to compare to one another and finally landed on a winner.

The plant came home with me and I repotted it into a slightly bigger nursey pot and added in the cute 4" one that I had been growing in the few months prior. I now had a massive, insanely photogenic Variegated Rubber plant.

The Ficus family is a hardy bunch-- with the exception of the well-known Ficus Lyrata-- and don't need tons of direct light. They are okay with indirect light in a South or West facing window-- possibly even East. Ficus Tineke need a bit more than your run-of-the-mill Ficus simply because they are variegated, which means they have less chlorophyll in their leaves to absorb sunlight. That being said, this plant has been in a planter behind my desk and has done just fine. Each day after work I will place it on my kitchen table next to a Western window for a handful of hours to give it some brighter sun before putting it back into its planter.

As for humidity and watering, I like to mist my Tineke every other day or as often as I remember. You can't really harm the plant with too much humidity, however, you CAN water the soil too much. I learned this the hard way when my 4" plant got fungus gnats from my overwatering even though I only watered about once every week or week and a half. Thankfully I caught the gnat problem when they were still larvae and swapped out the wet soil for new (dry) soil which suffocated those buggers. My current watering plan is once every two weeks and I will wait even longer between waterings as the weather cools down and the plant enters dormacy.


Are you guys interested in my houseplant series? Let me know below :)


I would love to know if you have any houseplant questions or requests for care tips. LMK in the comments below!

Sunday, October 28, 2018

CURRENT LUSH FAVORITES

Hello everyone!

I hope nobody is dealing with the Sunday Scaries right now although after what seems to be the official "halloweekend", I can only imagine most are.

Today's post is about my favorite products from LUSH. I went through my YouTube channel a few weeks ago and took note of some videos of mine that had tens of thousands of views. One of them was a video talking about my five favorite LUSH products and I thought it would be fun to remake that video/post today because my faves have changed SO much. FYI, if you'd like to watch in video form, my (new!) YouTube video version of this blog post is at the bottom of the post.

Before I get into things, I want to give it up to LUSH's website. When you search for products they will immediately show you a video of that product performing in water on the product page. It's so easy and helpful. I love LUSH.

LUSH dragon's egg, avobath, snow fairy naked shower gel, metamorphosis and brightside

I have three bath bombs, a bubble bar and a shower gel to rave about.

First up is Dragon's Egg bath bomb. This is my favorite smelling bath bomb of the crew-- it's a bright and poppy orange scent that is strangely relaxing (I don't necessarily associate citrus scents with relaxation). I would admit it's not the most exciting of bombs in terms of a show but when it boils down to it, you want your bathroom to smell wonderful and that's exactly what I get from this lil fruity pebble of a bath bomb.

Next is Avobath. It is, as you guessed, made with avocado. I would think that is part of the reason why this bath bomb leaves me feeling sooo silky smooth afterward. That plus the olive oil that I've read is in the ingredients! Avobath is similar to Dragon's Egg in scent-- a fresh lemongrass that is such a welcome scent after a long freaking day or a cold freaking night!

My last bath bomb is Metamorphosis. I like Metamorphosis for its scent, of course, but also for its PIZZAZ. Quite unassuming to begin with, this bomb is spicy and stormy grey but as it dissolves in the water it makes way for a rainbow of greens, oranges, and pinks. It caught me by surprise the first time I used this bath and although I continue to purchase this one because I like the peppery aroma, it may also be because of the surprise colors inside.

Brightside bubble bar is my go-to bubble bar. It shares the same orangey perfume as Dragon's Egg but gives you piles of bubbles AND lasts much longer. I have been a fan of bubble bars for as long as I've liked LUSH because of their value. You can use a tiny bit of a BB and get so many damn baths out of it whereas a bath bomb is a one-timer. Usually, Brightside is a much cuter, swirly (kind of tie-dye) bar but when I purchased mine they were all a little worse for wear.

Lastly is Snow Fairy (naked) shower gel. I make sure to pick up all of my Snow Fairy goodies during the holidays as that is the only time they're stocked. I have a sweet spot for this sweet scent and it seems I'll never kick it. I used to be a big fan of LUSH's Melting Marshmallow Moment bath melt because it was big, pink and smelled like bubblegum. I recently learned that Snow Fairy products are the same scent as Melting Marshmallow Moment! Who knew. I love both. I love the bubblegum. My fiancè does not. Whatever.

I decided to include an honorable mention because I have a product that I do purchase often but did not pick up in my most recent visit to my LUSH store. I really like the Dark Angels face/body scrub/cleanser. It's a solid block of product that you break a piece off of to create a paste in your hand before massaging it into your face and/or body. It's a bit messy but if you use it in the shower you should have no problem and it exfoliates so nicely once skin has been softened a bit in warm water. Dark Angels was an important addition to this post because it diversified my bath and shower product-heavy favorites list.


I hope I inspired someone to pick up one of my favorites or at least check them out in-store next time you're in. Let me know if we share any faves and if you have any holy grails from LUSH pls let me know below. I clearly need to fall in love with some products for skin, hair or beauty.

Monday, October 22, 2018

MASCARA FACEOFF: HOURGLASS 'CAUTION' VS. MILK MAKEUP 'KUSH'

Happy Monday my friends!

Today I'm comparing two newly-released mascaras. Kush by Milk Makeup and Caution by Hourglass Cosmetics. If you would like to hear what I have to say in video format with a side-by-side on-the-eyes demo, scroll to the bottom of this post to watch my YouTube video on these products!

hourglass cosmetics caution mascara milk makeup kush mascara
Please ignore the beat-up packaging.. it just goes to show that I've actually had these in my makeup bag and purse for the past few months!
I bought these mascaras fairly close to one another.. kind of.. (Kush on May 10th and Caution on August 24th) but at the time of their respective releases, they were each highly raved about online. I have never purchased a full-sized mid to high range mascara because I've never been unhappy with my drugstore Maybelline faves. I decided to give these both a go because of the hype and I feel that one of these were a waste of money while the other was not! See the below photos to try to guess which mascara matches with which response...

On-eye before and after swatch hourglass cosmetics caution mascara

On-eye before and after swatch milk makeup kush mascara

To further explain what's going on in the above photos, both mascaras are fine. They both lengthen and give body to the lash. The main differences are in 1. how much length they give, 2. clumpability and 3. depth of color.

1. Length -- The Hourglass Caution mascara ($29) gives my lashes a bit more length than the Milk Makeup Kush mascara ($24)

2. The Kush mascara clumps SIGNIFICANTLY more than the Caution mascara and is unable to get those clumps out.

3. The Caution mascara is a deeper black that stays true all day.

I much prefer the Hourglass Caution mascara because it applies beautifully and is never finicky, doesn't flake and stays a deep black all day. The packaging of the Hourglass mascara is sleek and pretty while the Kush mascara is heavy and clunky. The two mascaras are about the same amount of product (.34 oz Kush versus .33 oz Caution) with dissimilar price tags but if I had to choose one of these mascaras to repurchase, I would splurge the extra amount to buy the Hourglass for the formula.

I reviewed these mascaras side-by-side in a YouTube video, too! Check it out below:

I would love to know if you've tried one or both of these mascaras and what your opinion is on them! Mascara is such a personal choice-- I'm always interested in how one formula could work so well for one person and horribly for another. Let me know!

Shop this post below:

Monday, October 15, 2018

MAKEUP OF THE DAY: 10/13/2018

selfie showcasing lilac purple makeup with makeup geek pillow talk eyeshadow


I rocked a lilac-y eye this weekend. Here are the details:

Face:
-Fenty Beauty Pro Filt'r Instant Retouch Primer

-Fenty Beauty Pro Filt'r Matte Longwear Foundation in '120'
-Urban Decay Naked Skin concealer in 'Fair Warm'
-YSL Touche Eclat Radiance Perfecting Pen in '2'
-Rimmel Stay Matte powder in 'Translucent'
-MAC Wash & Dry Studio Sculpt Defining bronzer in 'Delicates'
-Tarte Amazonian Clay blush in 'Exposed'
-Tarte Amazonian Clay highlighter in 'Exposed'

Eyes:
-Urban Decay Anti-aging Primer Potion

-Makeup Geek eyeshadow in 'Petal Pusher'
-Urban Decay eyeshadow in 'Tease'
-Urban Decay eyeshadow in 'Secret Service'
-Makeup Geek eyeshadow in 'Pillow Talk'
-Colorpop eyeshadow in 'Glass Bull'
-Kat Von D Tattoo eyeliner
-Hourglass Caution mascara
-Eyelure x Nicole Guerriero lashes in 'Casually Glamorous'
BROWS: Anastasia Brow Powder Duo in 'Medium Brown' and clear brow gel

Lips:
-Tarte Tarteist Quick Dry Matte lip paint in 'Exposed'

-Lancôme Matte Shaker in 'Nude and Roses'

I ended up actually wearing Sugarpill's ‘Cupid’ out to the event I went to!


I love a good purple eye and although I did not intentionally go for a lighter, lilac kinda thing I really liked how it came out. Would you have added anything more to this look? Glitter? What about less? No false lashes? LMK your opinion!

Friday, October 5, 2018

FOODIE FRIDAY: SEEDY AVOCADO TOAST

Okay, okay. You may think this is a strange post. "Come on Bails— how hard could avocado toast be?!"

It's not. That's the point!

I'm big into avocado toast but not in the I'm-a-milennial-and-can't-afford-a-house kinda way. More like in the homemade, buy-one-bag-of-seeds-and-you're-good-for-months way. For those who may not know, I've been a vegetarian for over a decade. The math just barely adds up, yes. I was in middle school when I decided I would no longer eat meat. I went through some trials and tribulations but here I am thriving at age 25! A friend recently reached out to me asking for some veggie recipes so I decided I would continue on my Foodie Friday series where I’ll post every now and then with some of my tried and true veghead meals. First up? An avocado toast with two different salts and eight kinds of seeds.

bread with the seasonings and ingredients for avocado toast around it

avocado toast on piece of wood

Alrighty, here's what you're gonna need:

  • A good sourdough bread. The more local, the better, although my Safeway makes a fine loaf!
  • Coarse salt— I actually use two. A kosher salt and Maldon Sea Salt Flakes (they are worth it, trust me)
  • Black pepper
  • Crushed red pepper flake
  • Nutritional Yeast
  • Chia Seed
  • Hemp Seed
  • Trader Joe's Super Seed & Ancient Grain blend
  • An avocad
There's really not anything else to say. The good info was the blend of ingredients listed above! Toast your bread and smush on your avocado with a fork and layer up the toppings. It's sooooo good. Wanna add a egg? Easy. Hot sauce? Done. It's so fancy yet so easy and the perfect base to add on even more.

I asked my Instagram followers last month to share their go-to avocado toast toppings and I got some solid answers but some really wild ones as well. Let me know below what your personal go-to is!

Monday, October 1, 2018

MY CURRENT SKINCARE REGIMEN | OCTOBER 2018

Helloooo hellllooo heeeello!!

Today we're talking skincare. My routine, to be exact.

I seem to have a good thing going when it comes to my skin nowadays so I'm sharing my go-to products with you all while the days are still warm and my skin is not yet parched and cracked (coming soon: Winter 2018/2019 😒)

ole henricksen truth serum alastin retinol benefit it's potent drunk elephant protini polypeptide cream pixi beauty glow tonic on cb2 hex serving board
NEW BACKDROP ALERT !!! CB2 Hex Teak Serving Board — comment below to get in touch with me for a 15% off coupon!

Aren't they pretty?

We'll go from L to R...
First up is my love aka Ole Henriksen Truth Serum. I just allowed myself to buy a larger size during the Sephora VIB sale after running through some smaller bottles throughout the past year. It's a Vitamin C serum which I am told by my dermatologist is to be applied in the morning to help shield the skin from sun damage. That in and of itself is a joke because I get to work when it's still dark out, sit in my cubicle farm all day and then go home. But for the weekend, the Truth Serum is the bomb 😅 It absorbs quickly, smells of orange and has never once broken me out.

Next up is my current moisturizer, the Drunk Elephant Protini Polypeptide Cream. I bought this over the Spring to replace the moisturizer that I grew up smelling and using—it's by Olay and both my mother and sister use it! It was great but I had heard amazing things about Drunk Elephant and decided to give a couple of their moisturizers a go in sample form before indulging myself in a full size. The morning after I applied the Protini cream I was actually taken aback by how good my skin felt. I haven't gone a day without using it since! TBH I may survive the Winter after all because it's so thick and luxurious.

My current eye cream is Benefit's It's Potent! Eye Cream. I've been using this for years on end and have never had any issues. It's marketed to diminish dark circles, though and I've gotta say it does not do much in that regard. Supposedly it contains alcohol, too (thanks for that lesson, /r/skincareaddiction) so I don't think I'll be repurchasing it once I run out. Until then, it’s a fine cream in my experience.

Into the "actives"..

My dermatologist sold me on retinols when I went in for an overall check-up and to inquire on Botox (still want it. haven't gotten it. LMK if you have $500 I can borrow!!!) The product sold in my doctor's office is the Alastin Renewal Retinol. It is a less.. "intense" retinol so it was good for a beginner. I haven't noticed much of a difference but I like to think it's doing its job. I make sure to only use this at night and under my Protini so that 1. I don't get some breakout from overworking my skin and not moisturizing properly and 2. it doesn't counteract my next product...

Pixi Beauty Glow Tonic. This stuff. I LOVE this stuff. My same dermatologist (and others in the past) have told me that toners are not necessary and are full of alcohol and dry out our skin. I don't care. This stuff will remove texture on your skin like an eraser on one of those *good* mechanical pencils from when we were in school. The ones with the erasers that barely had to touch your pencil marks to get rid of them. Texture = gone. I make sure to not use this at the same time of day or on the same day as my retinol because it is an active and they will cancel one another out, making each useless. If I'm not using this in the morning I will use it at night and just skip my retinol that evening.

I guess I'm in the market for a new eye cream then, yeah? I'm considering the DE Eye Serum but I would love to hear any holy grails that y'all have. Leave me a comment below! Anyone use these products? Also, really, if anyone has $500 so I can get Botox I'll take it heh

Sunday, March 11, 2018

CURRENT MANTLE DECOR


I la la looove my fireplace area in my apartment.


I have a bundle of firewood just waiting to be burned during the winter and all throughout the year I have holiday-focused decor flooding this slab of wood under my TV. I was so excited when I moved in because my landlord left the wall mount for a TV on the wall with all of the wiring pre-done. I never knew what minimalism I was missing out on by having my TVs sitting on console tables and past mantles!


Having the television up and out of the way has allowed my decor choices to shine. The photo above is my "year round" line-up. When there isn't a major holiday coming up, this is the stuff that I have hugging my media screen.


Items featured:

Cactus: old Target decor piece from Spring 2017
Starburst figurine: old Target decor piece from ~2016
Wooden star: old Target decor piece from Winter 2013/2014
Candles: Target Hearth & Hand Pillar Candle in 'Cardamom & Vetiver' (Grey) and Target Hearth & Hand Pillar Candle in 'Sugared Birch' (White)
Candleholders: World Market Natural Wood Pillar Candleholder
Vase: Target Hearth & Hand Textured Sack Vase
Greens/faux eucalyptus: IKEA SMYCKA 


I'm very, very tempted to put some faux white brick or subway tile over the slate surround on my fireplace but that's another project for another day. What do you think? Anything you'd change?


Monday, October 9, 2017

NYX IN YOUR ELEMENT 'FIRE' AND 'METAL' PALETTES

Happy Monday! I am here to share some photos and swatches of NYX's new In Your Element palettes in Fire and Metal. This post will be short and sweet.. here is the outside of the packaging:


and the two palettes side-by-side (SWOON)


Here is Metal post-swatch...


The Metal palette is not good. There are a few shades that are and I was dying over the shade second from the right but overall these guys are glittery, flaky and seal after just one finger pass. No good. This puppy went back to Ulta!


HOWEVER


The Fire palette is sooooooo gooooooooooooooooood. If you're going to get some of these palettes, the Fire palette needs to be one. The first yellow shimmer (far right) is a bit lacking and the dark shade four from the left isn't as exciting as I expected it would be but the rest are buttery and beautiful.


I'm also interested in the Earth palette but it seemed too similar to Fire to make sense enough for me to purchase it. I bought these two palettes when Ulta was having a 30% off NYX sale so the price tags weren't too out of bounds for my wallet!


Thursday, October 5, 2017

FENTY BEAUTY ON A PALE GIRL

Woooooo hoooooooo!!!!!

New and exciting release alert!!!!

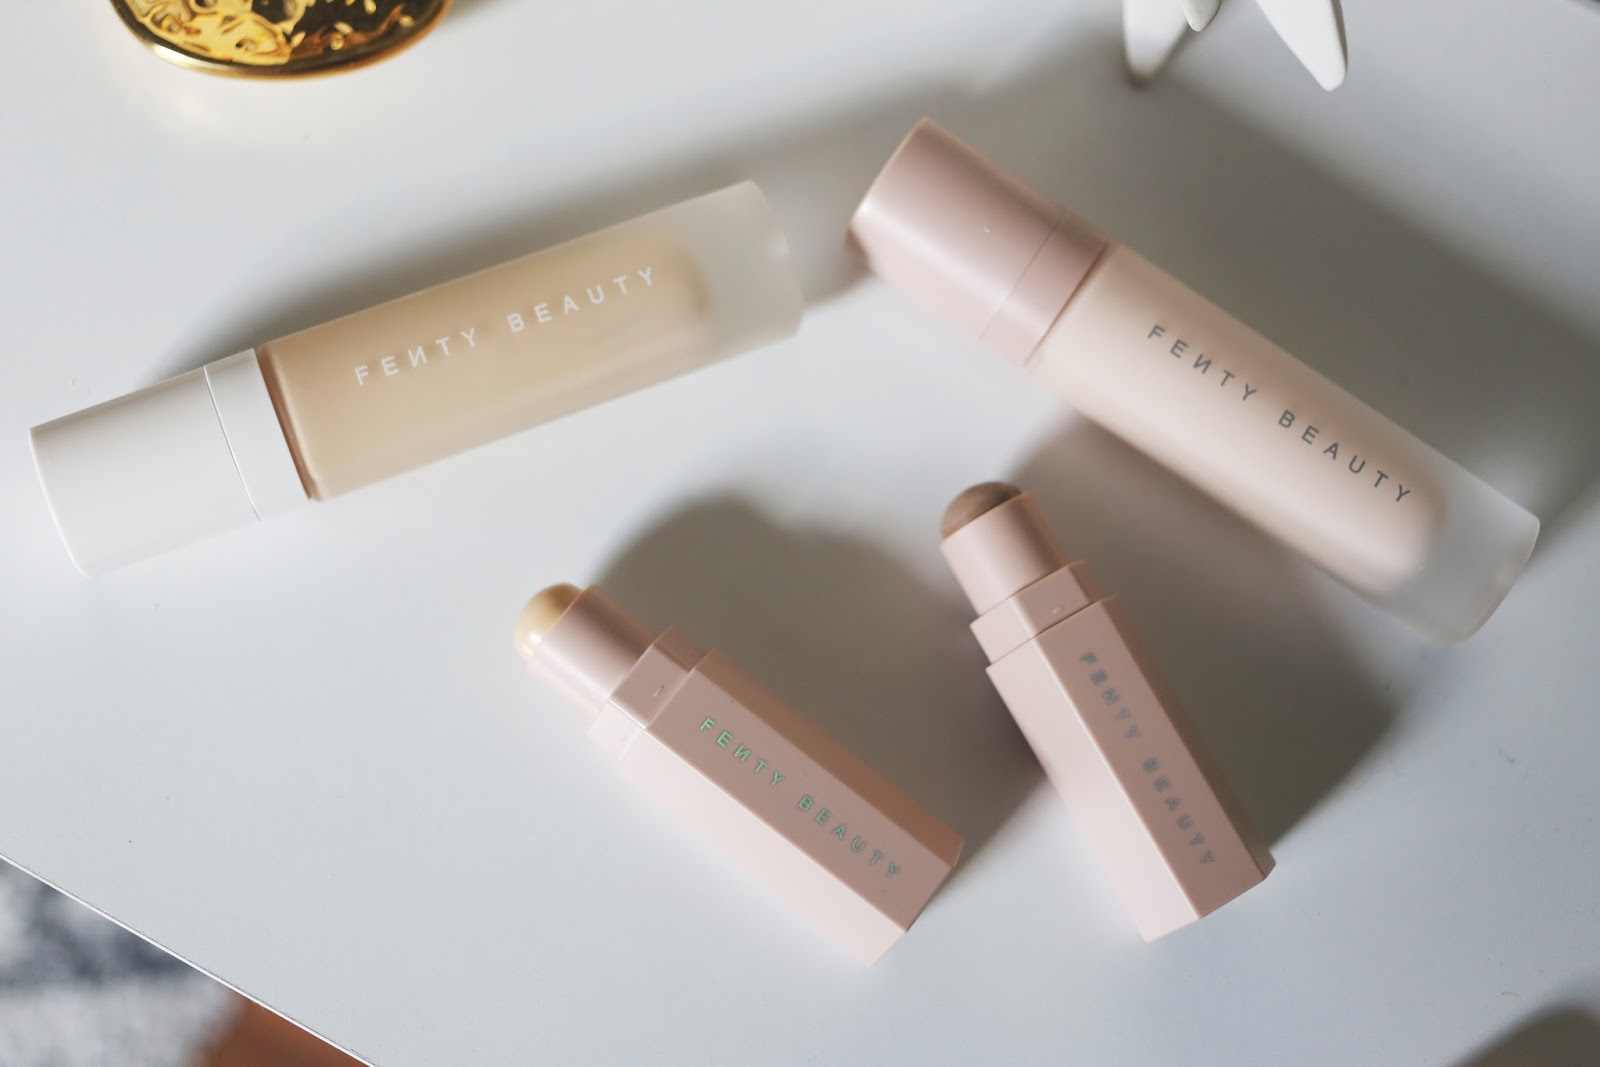
I have TRIED Fenty Beauty— Rihanna's makeup line that released a couple of weeks ago. I LIKE it!

For someone who considers themselves in tune with the beauty community, this release came and went without me knowing anything of it. It wasn't until I kept seeing Instagram stories… and posts… and blog posts… and articles on the products did I quite literally get up and run out of the door. To Sephora I went!

I tried four of her products— her face primer, foundation (I know), and two "Match Stix".. one for contouring, the other for highlighting.


fenty beauty amber porcelain match stixs on pale nc15 skin
Fenty Beauty Match Stix in 'Amber' (top) and 'Porcelain' (bottom)
As someone who is not afraid to take advantage of Sephora's incredible return policy, I am proud to announce that I only returned one of these products. And it wasn't even because of the product, really but here I am getting ahead of myself…

Let's start off with the fact that I don't really need to introduce the brand. Everyone else has and if you don't know about Fenty Beauty, just give it a Google :) As for the products, I will begin with the moisturizing primer. As a "no foundation" kinda gal, I appreciate this primer because it preps my skin for foundation in ways that I didn't know it needed. It makes your face slightly tacky and ready to layer while moisturizes so you aren't scaly or flaky underneath that MATTE FOUNDATION!!!!

Woo hoo! I love Fenty's foundation! First off, I'm not the lightest shade. I am not even the SECOND lightest shade. I wear 120— the third lightest. How amazing is that?! The formula of this foundation is light coverage with a matte finish so my frecks get their time to shine while my oil stays under control. I have found that dotting the foundation around your face with your finger and then following up with a Beauty Blender is the best way to apply this product because if you go in with a sponge from the get-go, the sponge will absorb most of this watery foundation.

The foundation has a liquid-to-powder feel and is marketed to not need setting powders so you're able to go right in with Fenty's Match Stix. These multipurpose cream sticks come in many colors to be used as a contour, bronzer, blush, highlight, eyeshadow and lipstick. I purchased 'Amber' to contour with because it is unbelievably cool-toned. It's similar but slightly darker, cooler and much easier to blend out than Colourpop's 'Dove' Sculpting Stick. The second shade I bought was 'Porcelain', which appears darker than it applies. The matte shades that are meant for concealing/highlighting are pretty natural looking so if you like a super highlighted undereye, this is not the product for you. I really liked Porcelain but I felt my spending was getting a little crazy and Porcelain wasn't a drop-dead unique kinda deal so I let it go over the others.

I did not buy any of the shimmery highlighter sticks or powders because they were all intensely glittery and I just know I would have hated them on my face. When it comes to the ones I did try, they're great. I'm excited to see the future of Fenty Beauty (although the sneak peek of the Holiday collection looks…….. ehhhh….. but we will hold out to truly form an opinion).

Have you tried any products that I didn't include in this post? I love seeing everyone's opinions on this line because it seems everyone has a different thing they like and don't like.


Friday, September 29, 2017

BITE BEAUTY LIQUIFIED LIPSTICKS IN 'ECLAIR', 'FLAMBE' AND 'BRAISED'

Welcome to my first feature of Bite Beauty on Beautymunson! I had been slowly building up a collection of Bite products when they released their Amuse Bouche Liquified Lipsticks. Not a LIQUID lipstick, a liquified lipstick. Do you remember where we all used to be before the liquid lipstick trend? Here!


I bought my typical, mid-Pink aka 'Èclair', a fun red-orange aka 'Flambé' and a deeper (and my go-to) red aka 'Braised'.


I really like these. One of the reasons I really like this product is because of the gel-like texture and the easy application. The product is very thick and luxurious, which is nice because the colors stays on your lips and doesn't travel outward. 'Braised' does feather a bit so I would recommend a liner with the deeper colors.

Now, would I say to wear your hair down and drive in a convertible rockin' 'Flambé' on your lips? No. But I recommend that anytime? No! I hate convertibles! They're always ruining my hair and makeup. Windows up, AC on— please.

If you want to try out the formula of this product without owning full sizes, Sephora has a holiday set out that features four minis including 'Flambé' and 'Braised' for only $22!!!

I'm all for a good, budge-proof liquid lip but I'm excited to see brands come out with different formulas alongside them as well.


Sunday, April 2, 2017

MAKEUP GEEK SHOWSTOPPER CREME STAINS IN 'DO-SI-DO', 'FOXTROT', 'FLAMENCO' + 'TWERK'

I grabbed four of Makeup Geek's newest lip products— their Showstopper Creme Stains in various different shades the day that they dropped. The packaging is so sleek and beautiful that I couldn't stay away! Unfortunately, I don't like the product inside of the packaging :(

But let's get some photos out of the way first...


and here are my four shades swatched on the lips:


Starting with just the base shades, I do like them. I didn't expect to like 'Foxtrot' and do. Same with 'Do-Si-Do' and 'Twerk' is just light enough to really show it's color well. I thought 'Flamenco' was going to be deeper but it's still a pretty red. I love the dancing theme of the shade names, too.

Now we can get into the obvious. The formula is horrific. I'm so confused by this product and I'm begging people to help me understand them because they are lightweight, yes. They're lightweight because they are so thin and streaky on the lips and once you get enough on your lips to make the color even, the product gets thick and cracks (see: Do-Si-Do)

They don't "stain", either.

I'm very sad with these :( I'm going to pair them with liners so I can get SOME wear out of them but ultimately on their own, they are not the best on the market. Stick with eye products, MUG.

Did anyone else pick them up ASAP? I would LOVE to start a discussion on them so I can understand them better. Since they're stains, I wouldn't expect that they're "supposed" to be layered over liners but if someone knows something I don't, my ears are open.

Have an awesome week!


Thursday, January 26, 2017

KYLIE COSMETICS ROYAL PEACH PALETTE + 2 LOOKS

Well, well, well…

Here we go again with another Kylie product. That doesn't suck. I saw the promo pictures for this product and felt like I could really do some fun things with this palette and it is comprised of shades that I don't feel like I already own (for the most part...). It was a recipe for success! I managed to snag this last week whilst in the middle of a manicure. It's okay. My nail technician knows of Kylie and her cosmetic brand and was just as excited as I was that I was able to purchase it.

This is the Royal Peach palette. It was $45 and has 12 shades in it. This palette also comes with a very decent blending brush.


I love the elongated layout of this palette and the mega-mirror. But the best part? The shadows are magnetized loosely in the palette meaning they can easily come out and be put into a Z Palette. My palette isn't even put together anymore!


There are lots of reddish peach shades in the Royal Peach palette. Thankfully, there are also some solid transition shades. 'Sorbet' is a pale orange, very similar to Makeup Geek's 'Peach Smoothie' and 'Sandy' is a warm mid-toned tan very similar to Urban Decay's 'Beware'. The poppy shades in this palette are 'Royal' a matte, bright blue, 'Mojito', a metallic yellow-green and 'North Star' which is a metallic lilac that is very close to Anastasia Beverly Hill's 'Macaroon'. There's enough excitement in this shade range to create many different looks without getting bored.

Here are two looks that I've created with (almost) all of the shades in the Royal Peach Palette.

Sorbet and Sandy thru the crease with Mojito on the inner/lid -- Duke and Crush on the lower lash line blended out with Cinnamon

'Sorbet' and 'Crush' on the crease and outer third, 'Seashell' on the center with 'Queen Bee' on the inner third -- 'Duchess' on the lower lashline and winged on the upper lash // had to pair this look with the @makeupforeverofficial Starlit Powder in '02' on the inner corner 


In all, I am very pleased with this! Kylie's products are becoming very trustworthy at this point and I can't wait to see what sector of makeup she journeys into next.


09 10